

Easy Side Braid Tutorial
With C’s lovingly grabby fingers constantly finding the hairs on my head, it’s time to bring back some favorite hairstyle from my past to pull my hair a bit out of my face without having to resort to a bun every day. This easy side braid is first up. Its’ quick, nice looking, and definitely gets some hair out of my face!
I have a tendency to get stuck in a rut with hairdos – usually wearing it straight or in some kind of bun – messy or a little put together. Since I hadn’t seen my hairstylist in 18 weeks until this last Tuesday (YAAAAAS!!!!), the terrible buns were happening more than anything else.
I’m not showing it here, but you can double up the mini braids for a slightly different option! These easy side braids for long hair may be my best (re)discovery of the summer!
Also, if you live in a humid place or just have hair that loves to frizz, make sure to use a good anti-frizz spray before you start doing the braid here! Check out my favorite clean beauty hair products (even for my long hair).
CONTENTS
Easy Small Side Braid
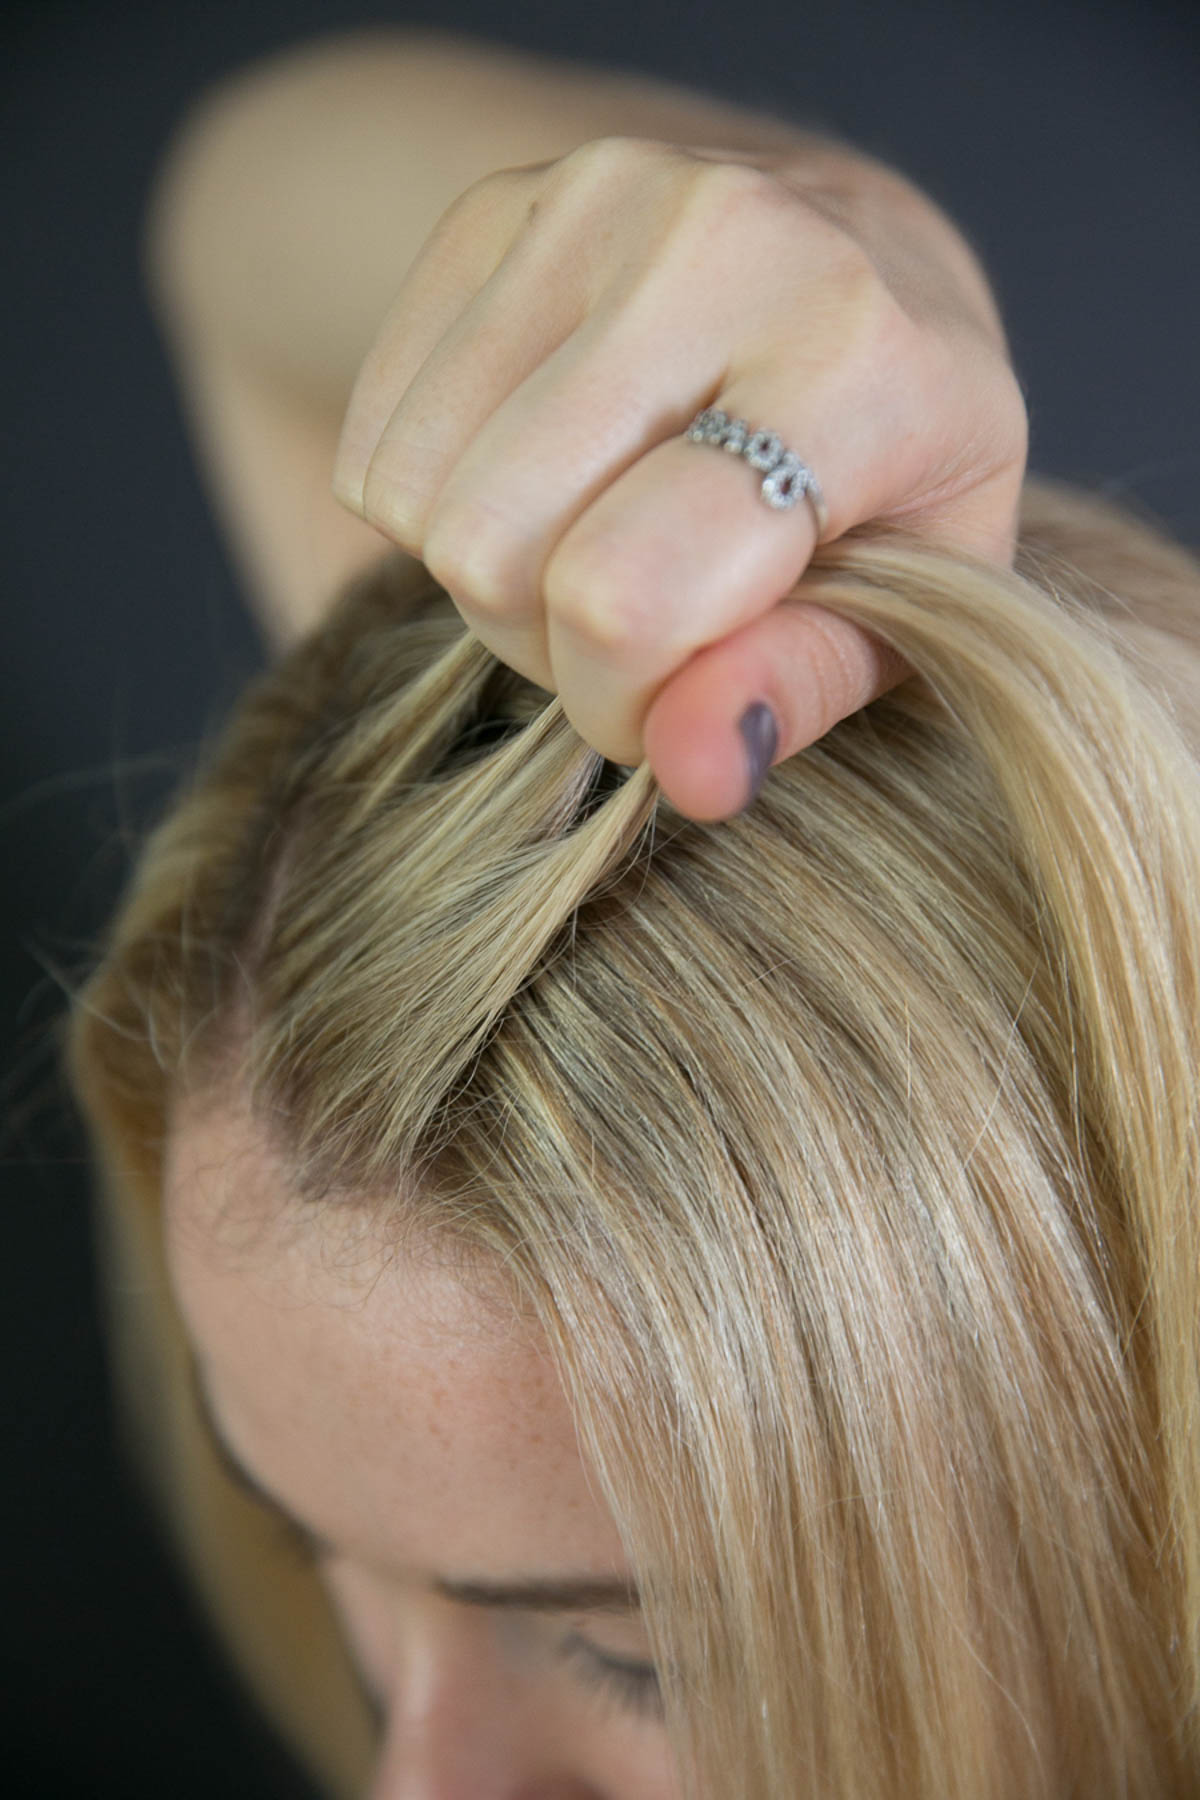
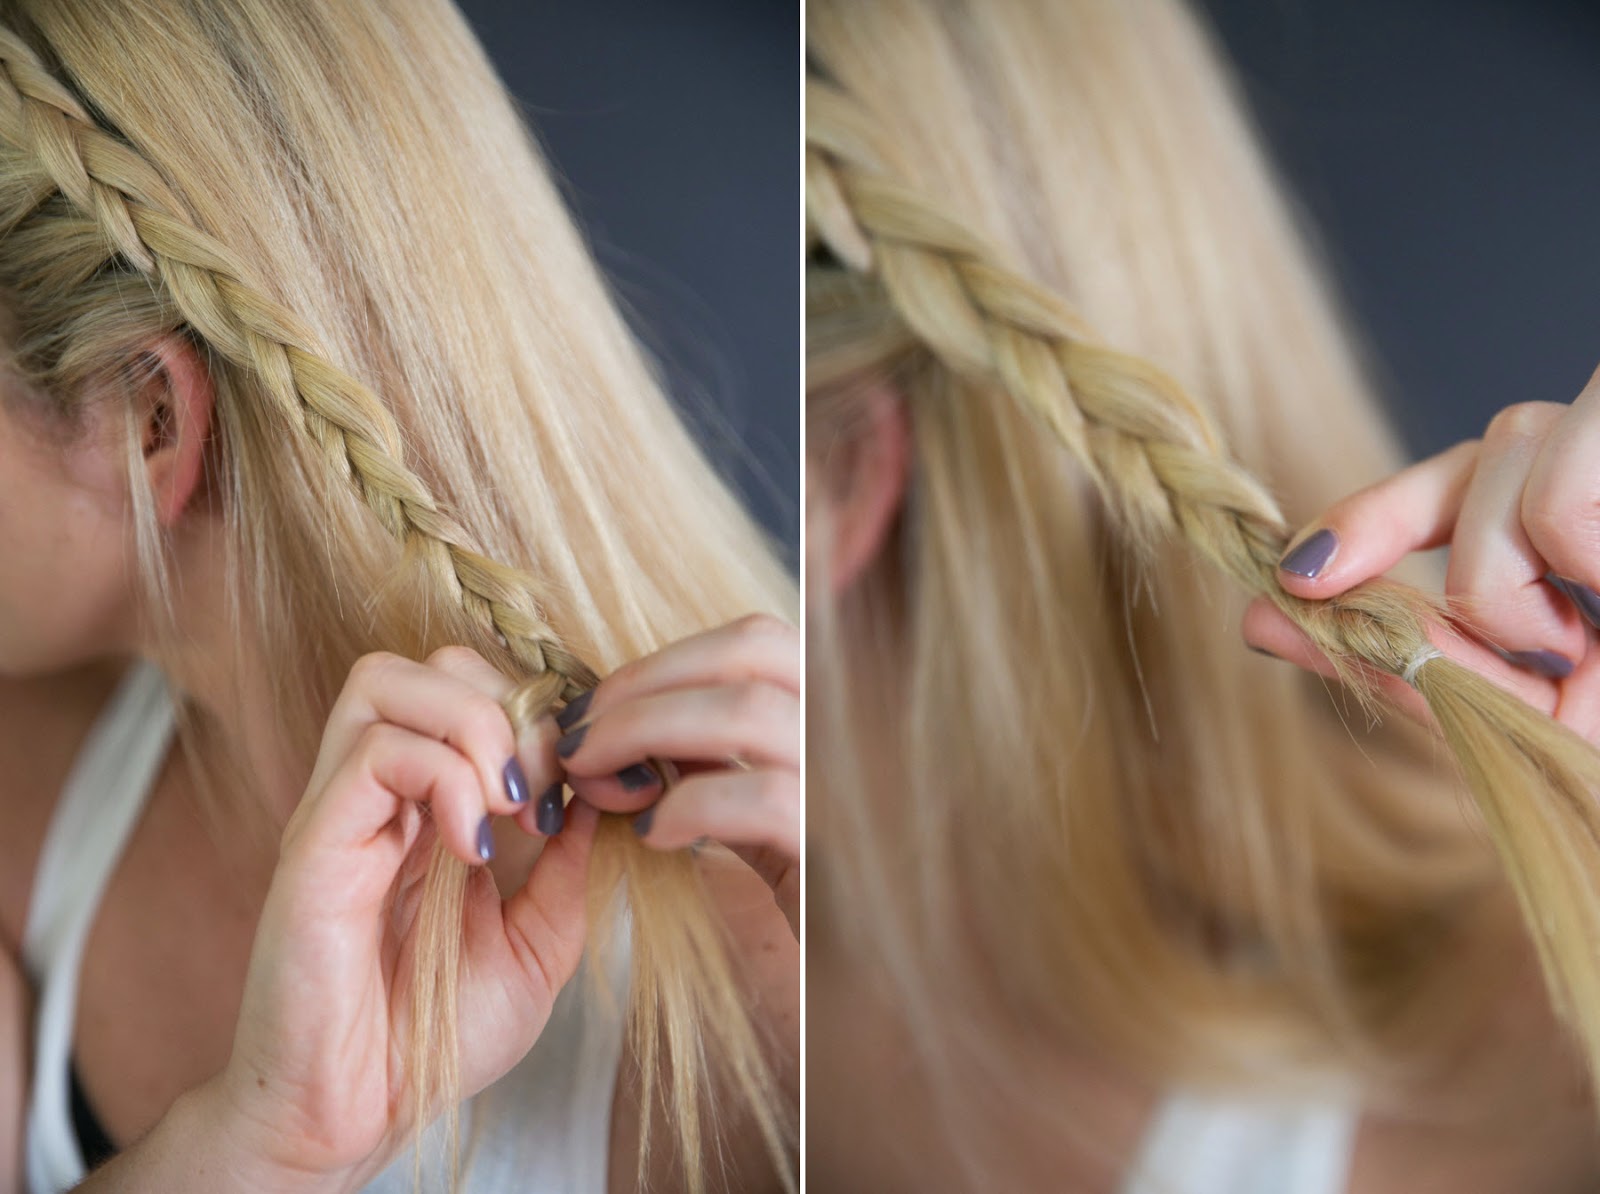
Part your hair just off-center. On the side of more hair, take a thin line of hair along part, about two inches long. Divide into three pieces.
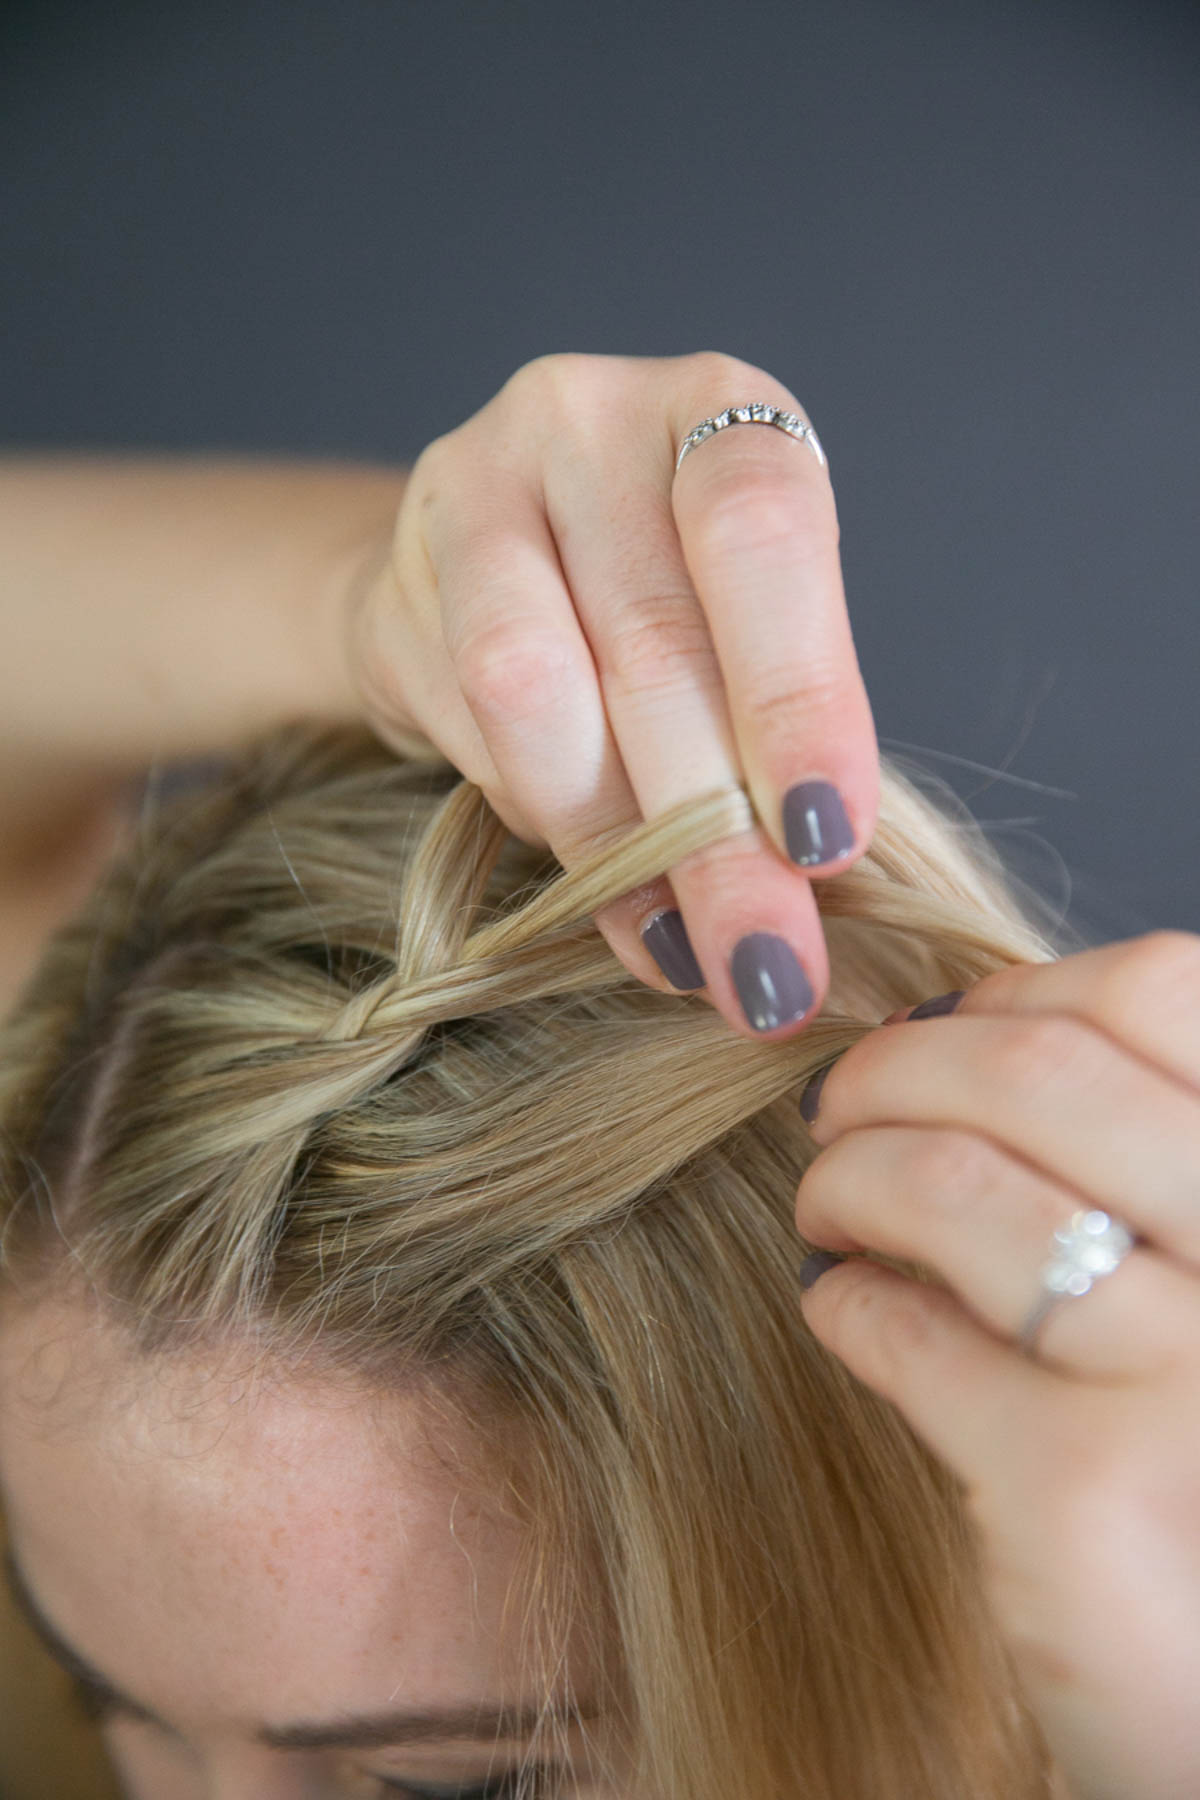

Begin braiding* hair down hairline adding hair only from the front.
This is a half-french braid of sorts. Instead of grabbing hair with every movement, it’s done just half the time. Be sure to only grab about a half inch from the front.
*I did an inverted braid here where hair is woven into the braid from the bottom up and not the traditional method of weaving new hair in from the top down.
This hairstyle can be done with a traditional braid or the inverted method. Here’s a good video to see how to do the basic inverted braid.
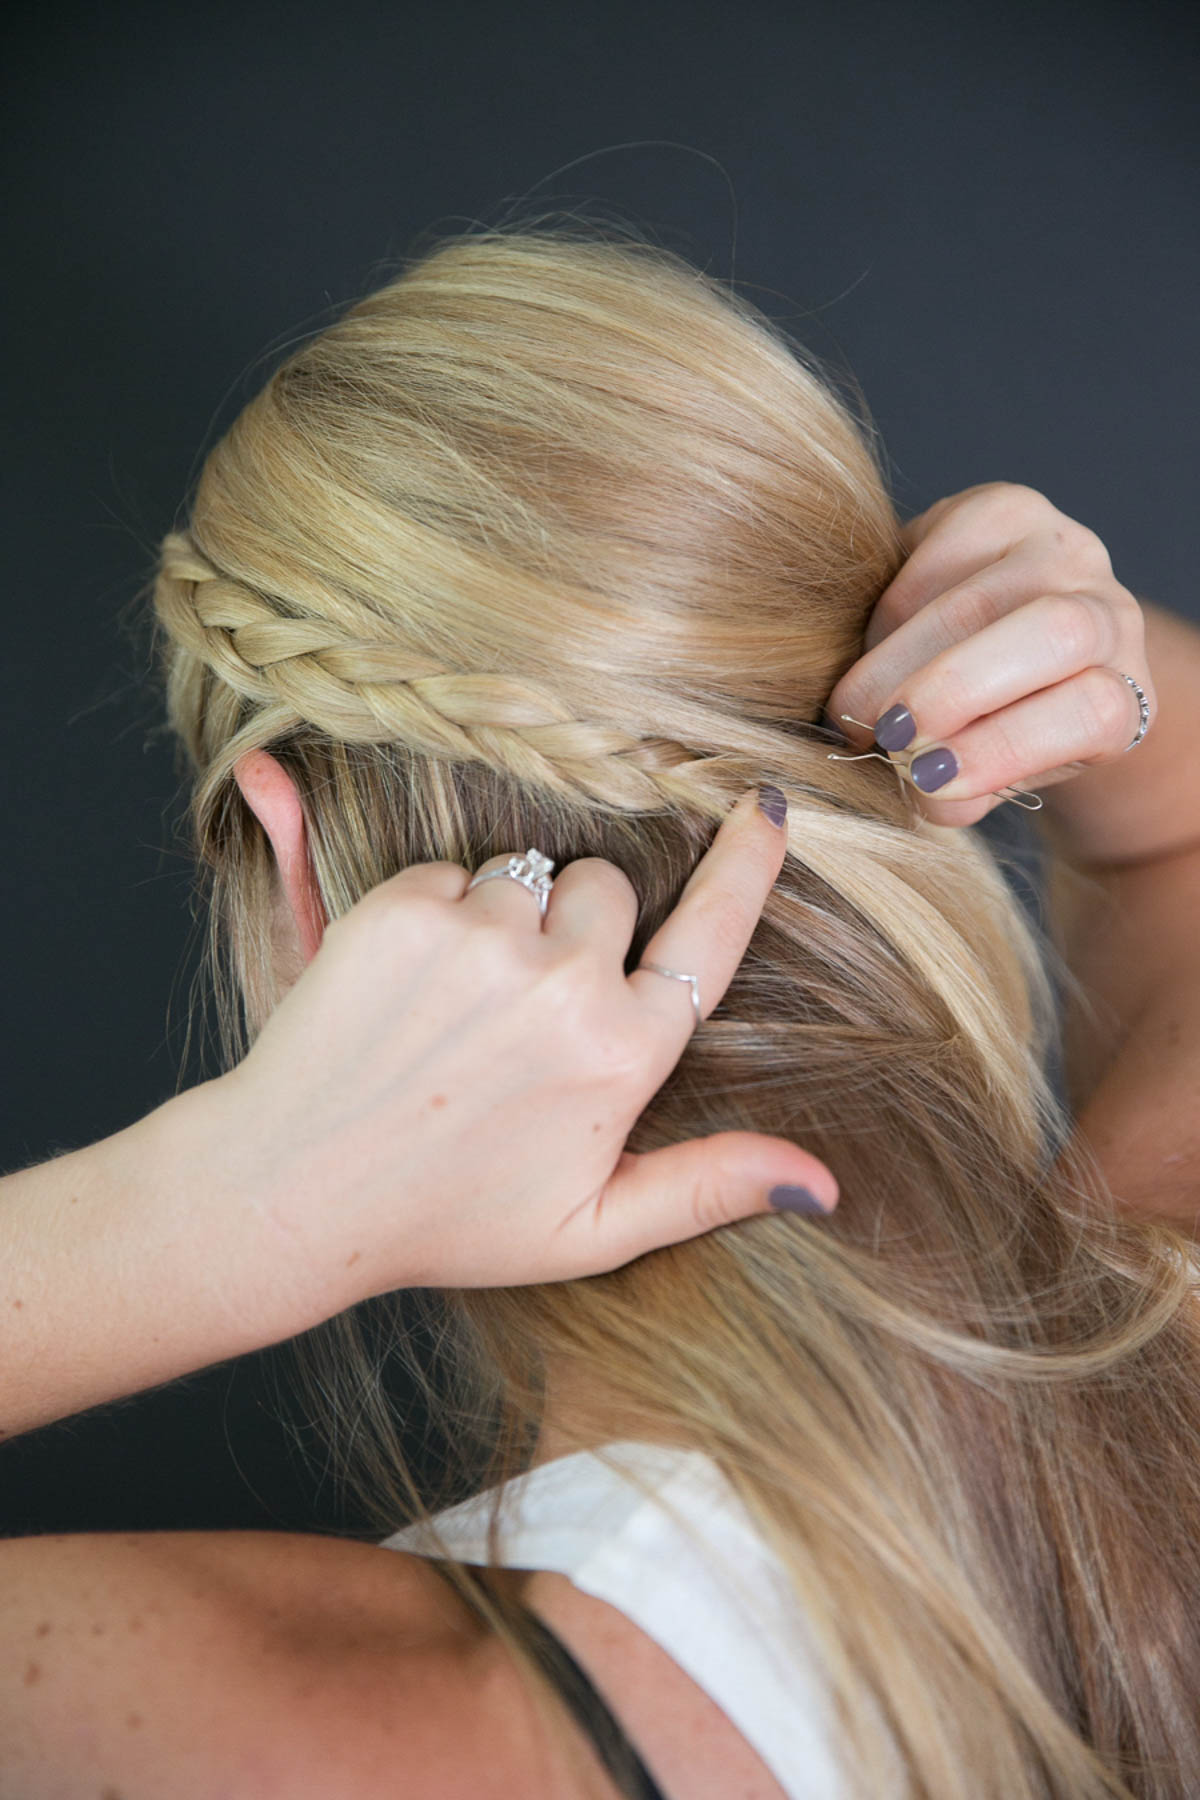
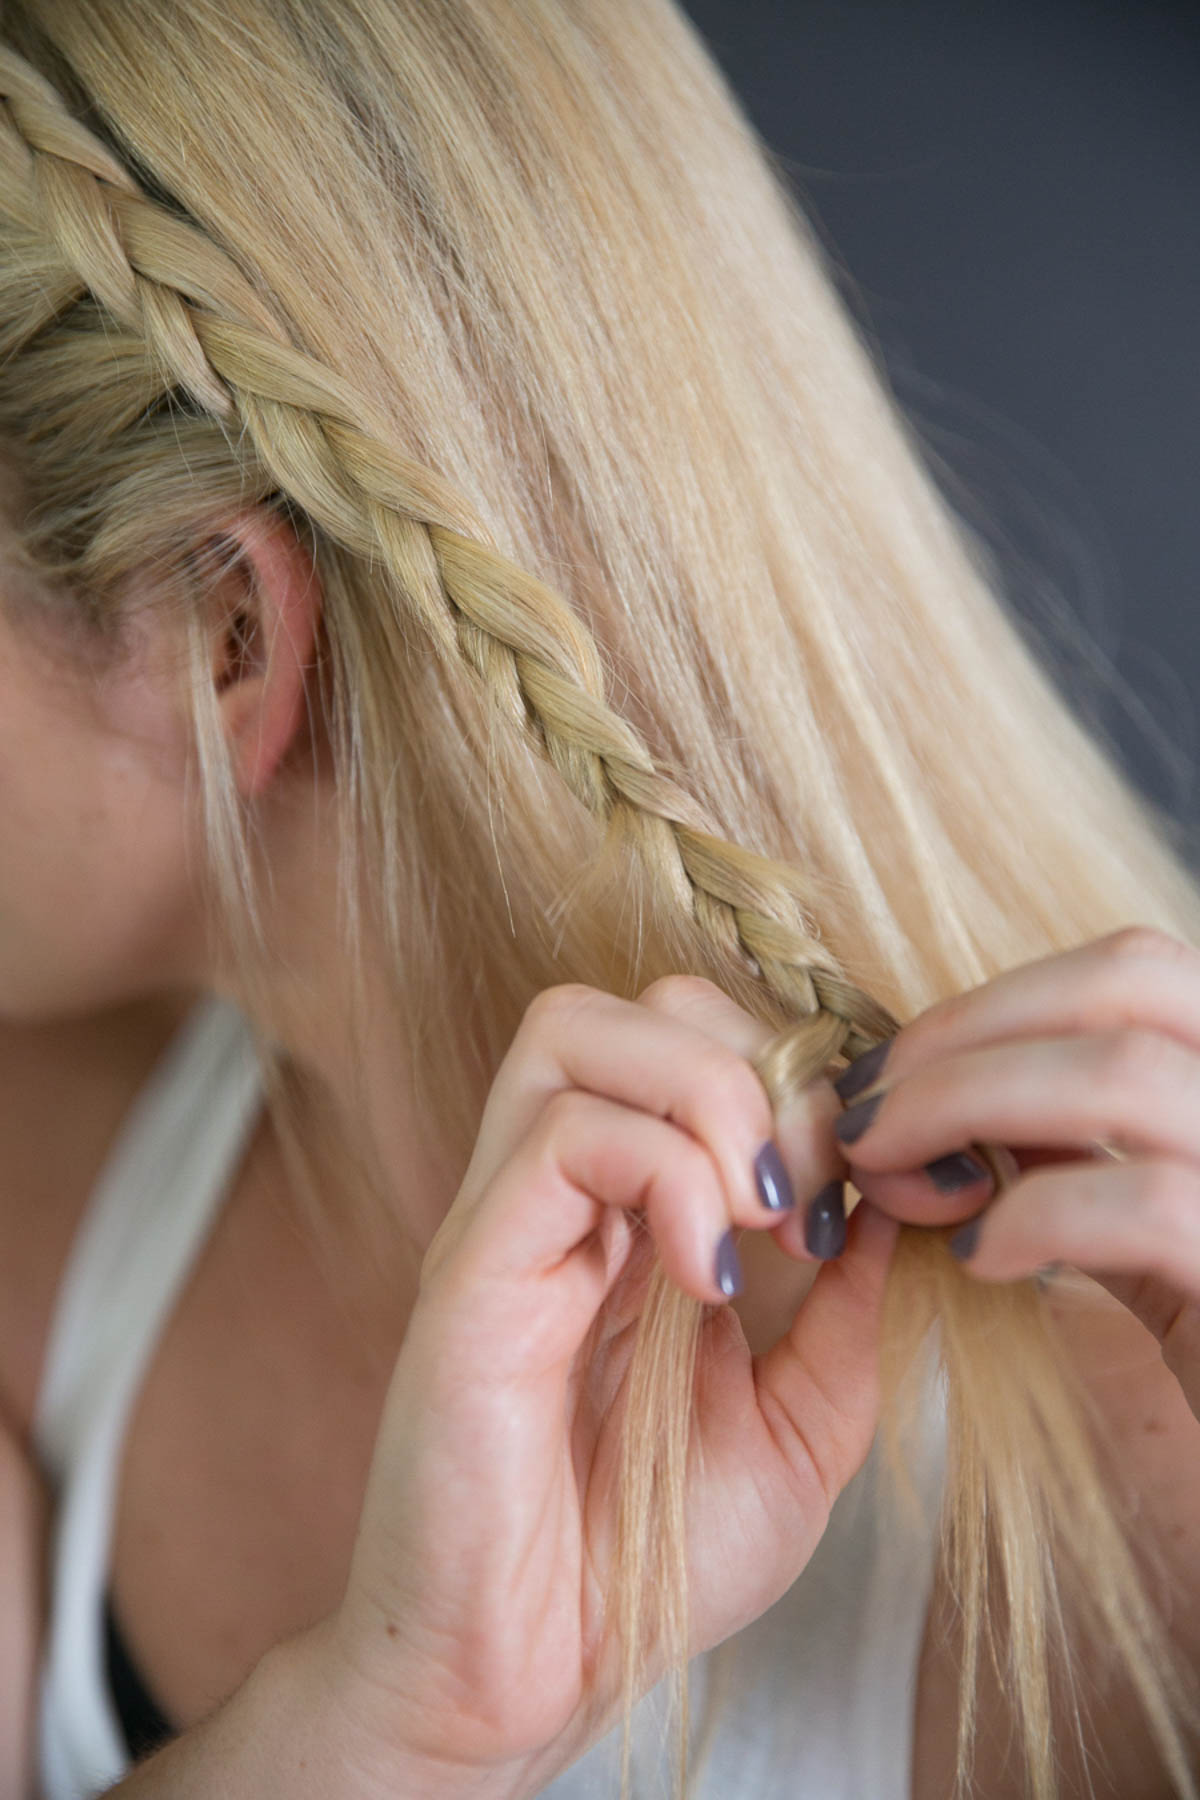
Continue to pull new hair into braid until you’ve passed your ear. Then continue braiding hair until braid length reaches the middle of the back of your head. Secure with small hair elastic.
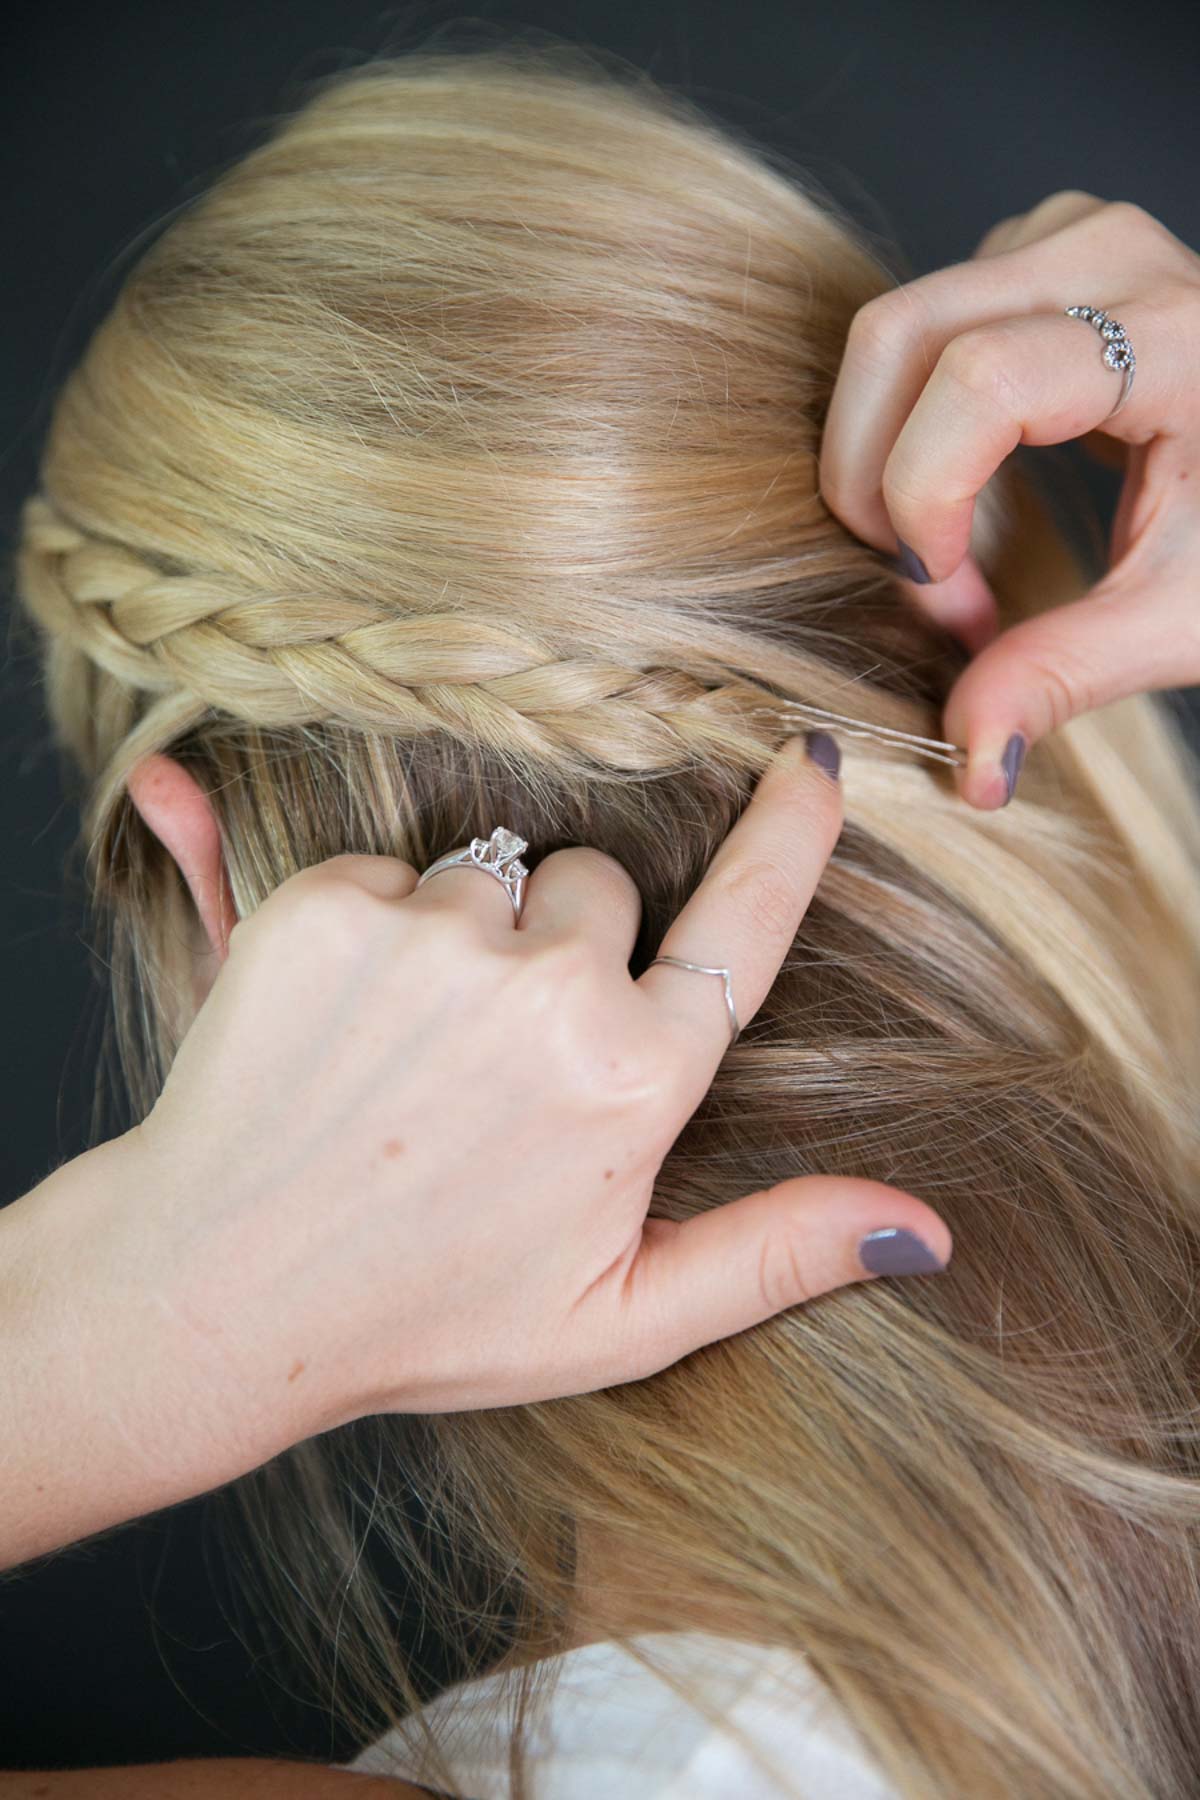
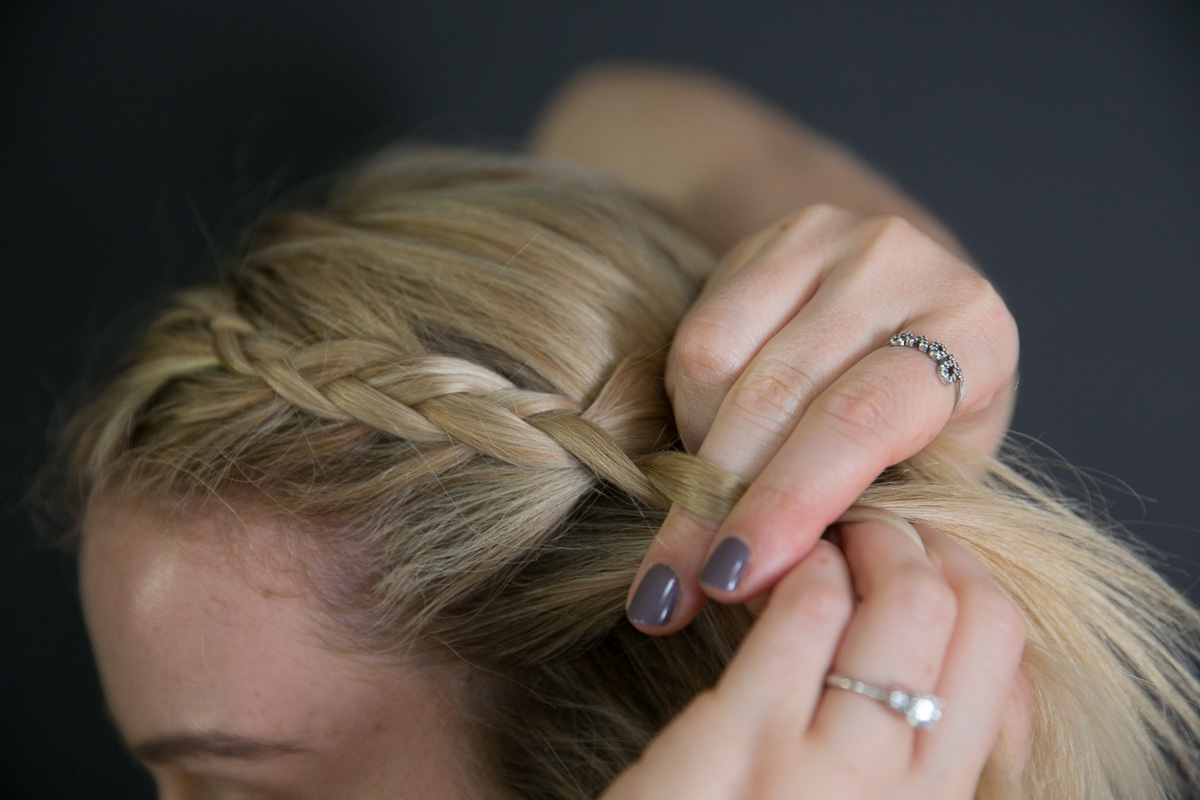
Sweep all hair above braid out of the way (can use a hair tie or clip). Secure braid in place with two mini bobby pins – facing opposite directions. Let remaining hair down.
Check out these MUST HAVE HAIR PRODUCTS + TOOLS. I’m slowly working on finding clean beauty brands for hair products. Right now Innersense is hitting it out of the park with great, clean hair care items! Try their hair mask and treatment oil. Use code LUCI15 for 15% off your first purchase.
See my Innersense Hair Product Review here for full reviews and favorite products!
You can check out these posts for clean brands at your favorite stores: Clean Beauty at Nordstrom Clean Beauty Brands at Sephora Clean Beauty at Target Clean Beauty at ULTA Clean Beauty at Walmart

Variations on Small Side Braid
I most commonly wear this easy small side braid with my hair down…at first. Then at some point I’ll put the rest of my hair into a low ponytail or bun – a great second day hairstyle.
You can also easily do two braids (one on each side). When I do this, I like to join the ends of the braids with a clear elastic. I take one-third to one-half of my lose hair and pull it up into a clip to get it out of the way, secure the braids with the elastic, then drop the hair over the braids.
And then, obviously, you can work the small braid into a larger single braid.
Looking for larger, single side braid that pulls in all your hair? Try this French One-Side Braid Tutorial!
All Hairstyle Tutorials
How to Curl Hair with a Flat Iron (video)
One-Sided French Braid Tutorial
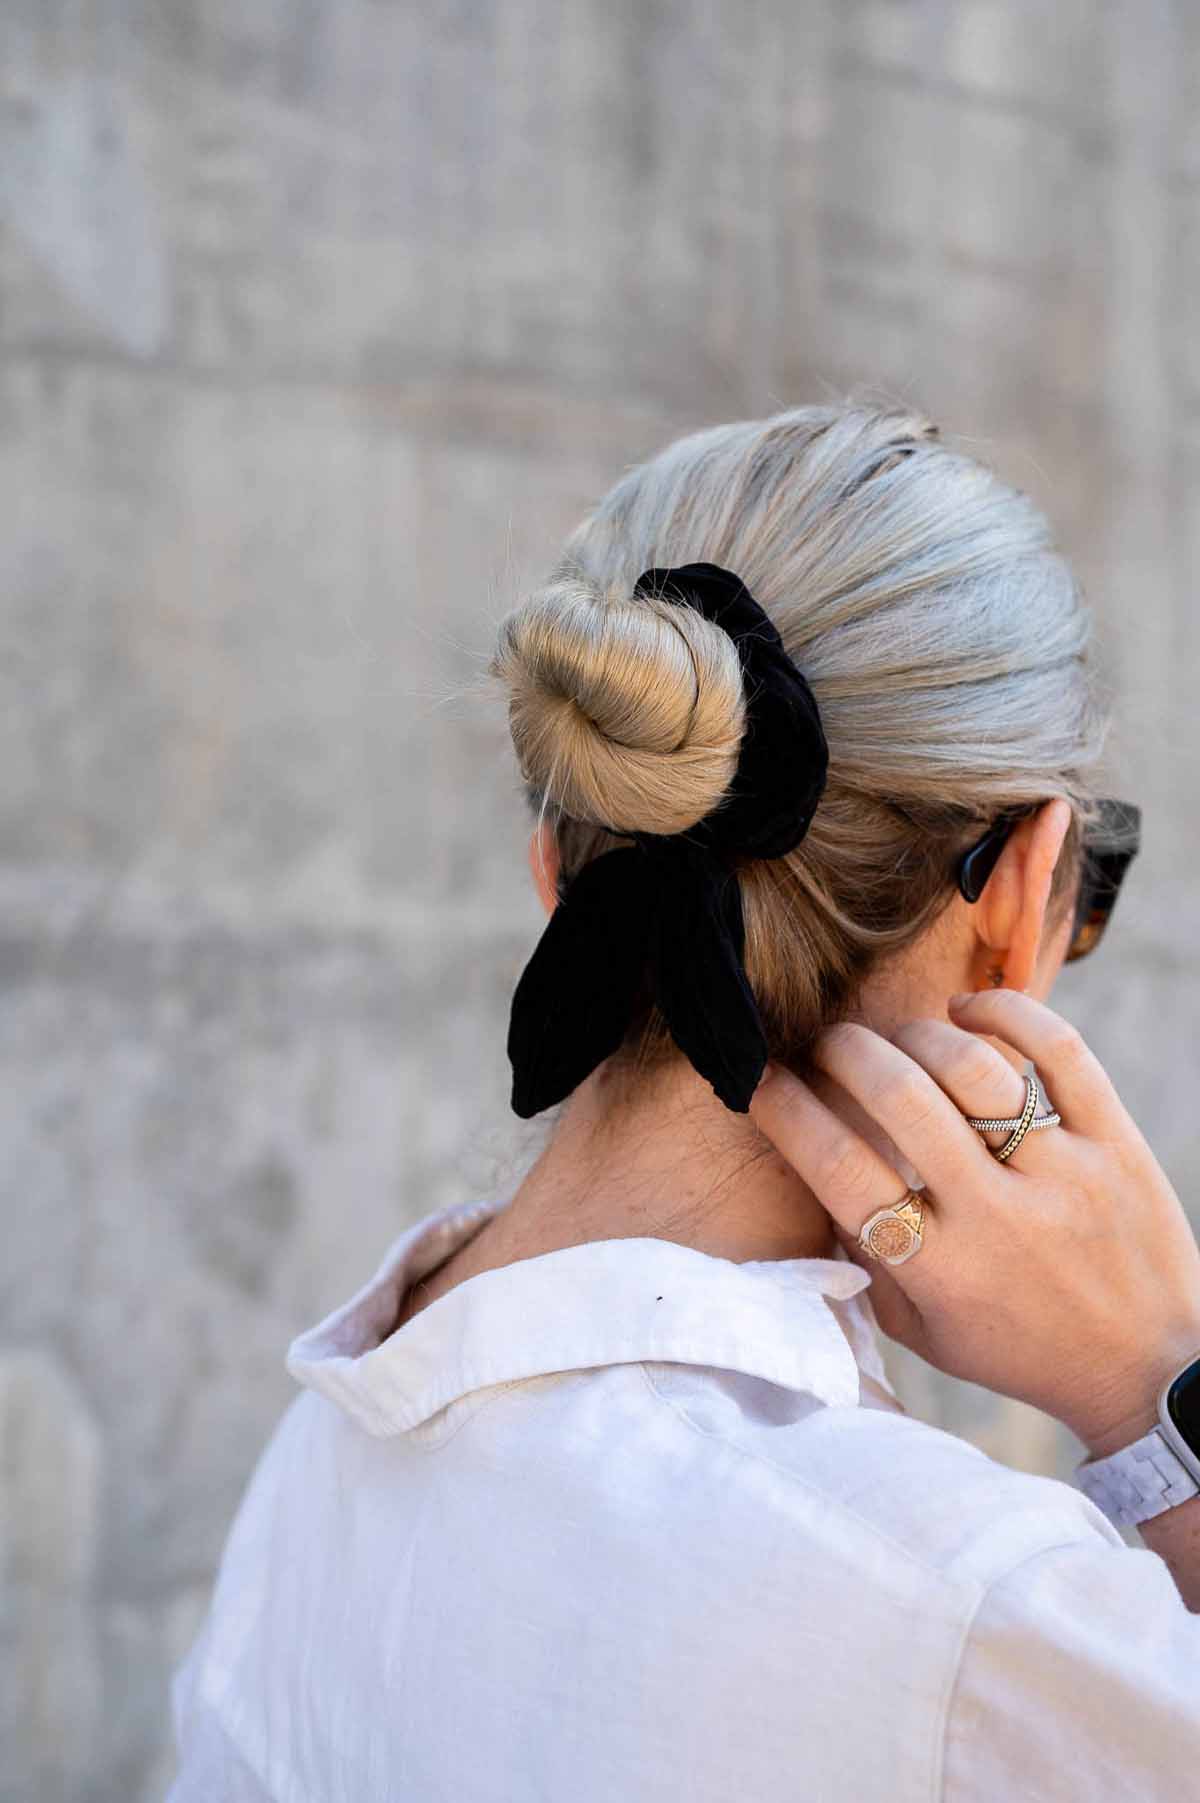
photography for Easy Side Braids for Long Hair by Karen Ard

Easy Small Side Braid
If you're looking for an easy, elegant way to wear your hair down but keep your hair out of your face, try this easy small side braid. It's great for short and long hair. Try an easy small side braid or two for an easy, fun hairdo. This step by step photo tutorial shows you how to do it easily.
Materials
- antifrizz serum/gel/hairspray to help flyaways
Tools
- mini bobby pins
- mini hair elastics
Instructions
- Part your hair just off-center. On the side of more hair, take a thin line of hair along part, about 2" long. Divide into three pieces.

- Begin braiding* hair down hairline adding hair only from the front. This is a half-french braid of sorts. Instead of grabbing hair with every movement, it’s done just half the time. Be sure to only grab about a half inch from the front.

- Continue to pull new hair into braid until you’ve passed your ear. Then continue braiding hair until braid length reaches the middle of the back of your head. Secure with small hair elastic

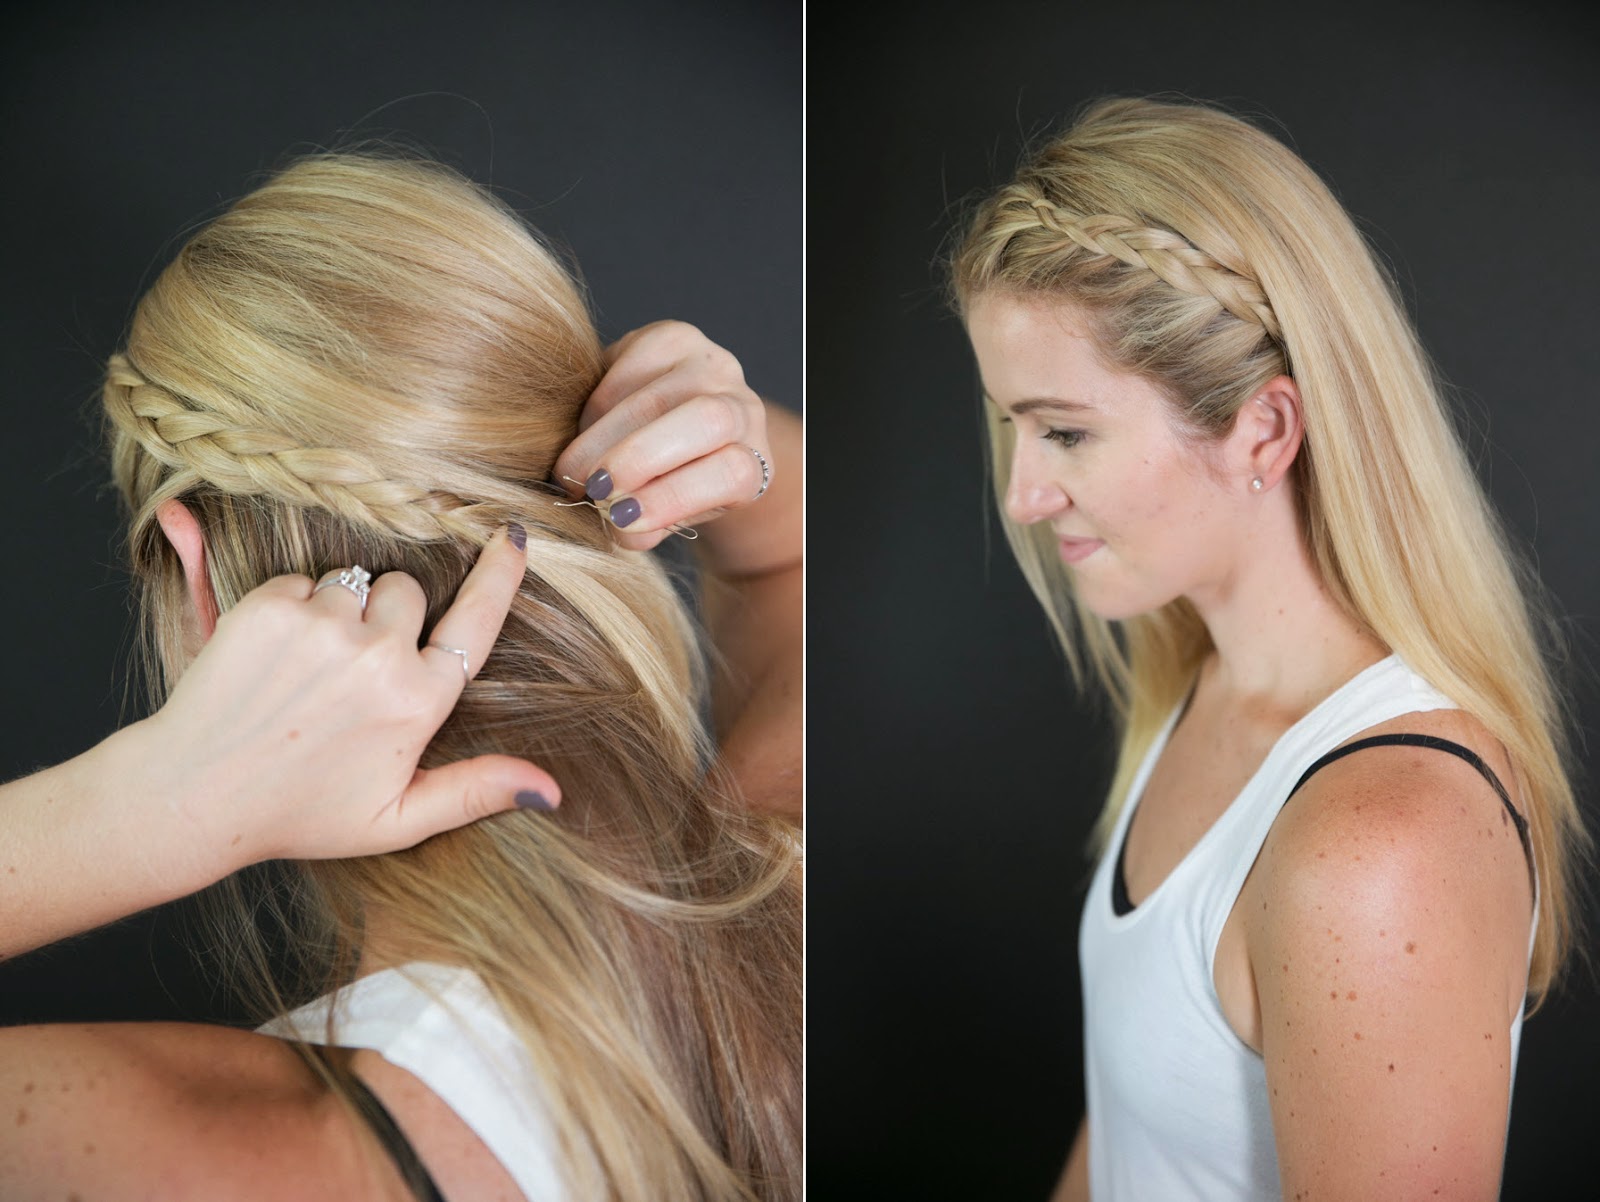
Sweep all hair above braid out of the way (can use a hair tie or clip). Secure braid in place with two bobby pins – facing opposite directions. Let remaining hair down.
Notes
Save this tutorial on Pinterest here!
Try this hairdo? I'd love to see how it turned out…
PINTEREST: Upload a photo and your review to this Pin!
INSTAGRAM: Tag me @lucismorsels!


I like it! I tried it ! It works!
I am going to dubai and was searching for some hairstyles to show off there and i saw this website and i thought I should give it a try and I have no regrets! Thank you so much for sharing this with us!